
Decided to make an updated tutorial after 6 years :). In this video, I will show you how to make smooth animations with Roblox Studio and the Animation Plugin.
Sorry for my awkward english ^^’.
–Plugins
ZeroBits’ Welding Plugin: https://www.roblox.com/library/336226776/Content-Deleted
Load Character Lite:
https://www.roblox.com/library/752585459/Load-Character-Lite
Reverse Easing Direction: https://www.roblox.com/library/8078043583/Revert-Cubic-Easing-Direction
–Time stamps
0:00 – Intro
0:38 – Background
2:33 – Animating
11:53 – Elements
17:37 – Camera
23:46 – Final touches
25:20 – Recording
28:17 – Editing
30:27 – Conclusion
— F.A.Q
Frequently asked question in the comments will be answered here.
0. I can’t find the Create Weld button! Where is it?
After installing the plugin, you should restart Roblox Studio. The Create Weld button should appear then in the Plugin tab.
1. Why don’t you use Moon Animator?
Moon Animator is a good alternative. However, both Animation Editor and the Moon Animator have their own advantages:
– The official Animator Editor is overall better for animating R15 models thanks to the Inverse Kinematics option.
– Moon Animator is less buggy than the Animation Editor.
– Moon Animator let you create size and color transitions.
– Animation Editor can be executed in Preview Mode, which is useful when you need special effects with physics.
2. Sometimes, I can’t select a part/limb to move or rotate it while using the Animation Editor Plugin.
This is another fault cause by the Plugin. This usually happens when you move a part too far from it’s point of origin (for example, not being able to select the hand of your character when they extend their arm, or the part of the camera model after dragging it).
However, you can select that part by clicking it under the list of parts in the Keyframe window.
This is a current issue which the Roblox Devs has yet to fix.
3. Why is your Roblox Studio window dark?
You can set Roblox Studio in Dark mode. Go to File – Settings – Theme – Dark.
4. Why is ZeroBits’ plugin deleted/tagged as [Content Deleted]?
For some reason, Roblox mods deleted the title of the Plugin. However, the Plugin itself works fine, so don’t worry.
5. How do you move/rotate the parts so smoothly?
Go to Model tab, Snap to Grid section and uncheck Move and Rotate.
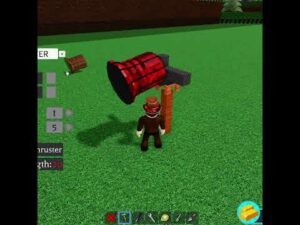
6. When I select the Dummy with the Animation plugin, there’s an error message saying: “Rig Error(s) Detected”, “The following parts are affected by Multiple Motor 6D: Righ Hand.” What do I do?
As I specified in the video (6:21), you have to select FIRST the Bazooka and then the hand. If you select the hand before the Bazooka and click on Create Weld, the dummy structure will break, displaying this error message. To fix this, just delete the Weld and re-weld the Bazooka and the hand in the right way.
— Scripts
Animation Script—————————————————————————————————–
local KeyframeSequenceProvider = game:GetService(“KeyframeSequenceProvider”)
local function setAnim(model,animName)
local hashId = KeyframeSequenceProvider:RegisterKeyframeSequence(model.AnimSaves[animName])
local Animation = Instance.new(“Animation”)
Animation.AnimationId = hashId
if model:FindFirstChild(“Humanoid”) then
return model.Humanoid:LoadAnimation(Animation)
else
return model.AnimationController:LoadAnimation(Animation)
end
end
wait(5)
local animController = setAnim(script.Parent,”YOURANIMNAME”)
animController:Play()
animController:AdjustSpeed(1) — Adjust animation speed here. 1 = Normal Speed, 0.25 = 4 times slower
Spawn Part Script—————————————————————————————————–
local part = Instance.new(“Part”,workspace)
part.Name = “CameraAngle”
part.Transparency = 0.5
part.Size = Vector3.new(1,1,1)
part.CFrame = workspace.CurrentCamera.CFrame
part.BrickColor = BrickColor.Blue()
Camera Script—————————————————————————————————–
local Run = game:GetService(“RunService”)
local camera = workspace.CurrentCamera
local camPart = workspace.CameraModel.CameraPart
camera.CameraType = “Attach”
camera.CameraSubject = camPart
local offset = CFrame.new(0, 0, 0)
Run:BindToRenderStep(“Attach”, Enum.RenderPriority.Camera.Value, function()
camera.CFrame = camPart.CFrame * offset
end)
—————————————————————————————————–
–Music used
https://youtu.be/NIWyZmFSep0
https://youtu.be/PhIkkcQV1uc
https://youtu.be/py60u7pnRUA
https://youtu.be/nGnnTDJHyoo
https://youtu.be/mm4Y58L7bSA
https://youtu.be/2SY6f6i2Mt8
https://youtu.be/8El8ZP8LMFE
https://youtu.be/-vP3XSoAr4Q
https://youtu.be/h6ByRXZCg9k

![How to Make a Shop Menu GUI [Updated Version] – Roblox Studio Tutorial](https://rumblerealm.com/wp-content/uploads/2024/05/6003-how-to-make-a-shop-menu-gui-updated-version-roblox-studio-tutorial-300x225.jpg)


TUTORIAL UPDATE!!!
Roblox has removed BodyVelocity and BodyAngularVelocity show in 13:16 and replaced them with LinealVelocity and AngularVelocity.
In orden to use LinealVelocity instead of BodyVelocity, do the following:
1. Left Click on the Rocket > Insert Object… > Attachment
2. Now insert the LinealVelocity
3. While having LinealVelocity selected, click on Attachment0 and select the attachment
4. Set MaxForce to 400000
5. Set VectorVelocity as I set the Velocity value in 13:29
To use AngularVelocity instead of BodyAngularVelocity:
1. Follow the same steps (1, 2 and 3) with an AngularVelocity instead.
2. Set RelativeTo property to Attachment0
3. Set MaxTorque to 400000
4. Set AngularVelocity to (0, 0, 10). Change 10 to a higher value for more rotation speed.
If you have any question, you can read F.A.Q. section in the description.
im your 1,900 comment. pls tell me how to get the "create joint" thingy.✨✨
THIS IS BROKEN NOW AS OF 2024 JANUARY
What to do if no create joint button?
hey! i think roblox banned the welding plugin…
bro the script wont work!
why cant i find the inverse kinematics button
i cant get the zerobits plugin